The short answer
Professionally painted kitchen cabinets using a proper 2-component (2K) polyurethane finish can last 10 to 20 years — equivalent to the finish on a brand-new factory-built cabinet. A heavily used kitchen with lots of cooking, moisture, and small children might be closer to the 10-year end. A moderately used kitchen that gets reasonable care can easily reach 15 to 20.
That said, durability isn't just about time — it's about what happens during that time. A well-painted cabinet can scratch, just like the paint on your car. But it should not chip, peel, or fail from normal cooking and cleaning. If painted cabinets are peeling within a few years, something went wrong — either the wrong product was used, or the prep work was cut short.

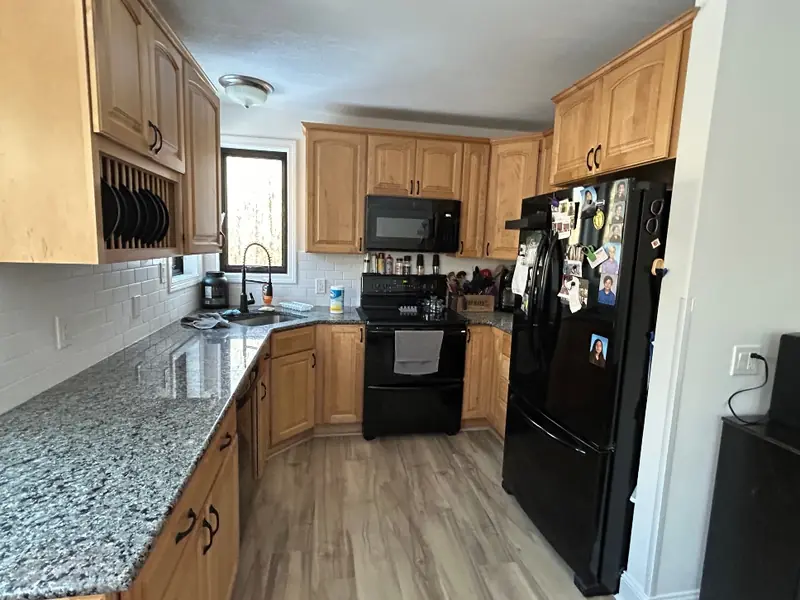
The typical starting point — stained oak or dated finish, structurally sound but ready for a refresh. Most Western MA kitchens built between 1985 and 2005 look something like this.
Why the product matters: 1K vs 2K finishes
Not all cabinet paints are created equal — and the difference between a finish that lasts a decade and one that fails in a few years often comes down to a single question: is it a 1-component (1K) or 2-component (2K) product?
1K products come ready to use in a single container. This includes paints you'd find at a hardware store — Benjamin Moore Advance, Sherwin-Williams Emerald Urethane, and similar products. These are good paints. They work fine for furniture, trim, and standalone cabinetry in low-humidity areas. But a kitchen is a different environment. Constant heat, steam, water splashing at the sink, grease from cooking — all of these attack a 1K finish over time, causing it to soften, chip, and eventually peel.
2K products require mixing two separate components — a base and a hardener — that chemically react and cure into an extremely hard, durable film. Once fully cured, a 2K polyurethane is highly resistant to moisture, heat, solvents, and the kind of daily wear that destroys softer finishes. This is what automotive and industrial finishes are made from, and it's what should go on kitchen cabinets.
At Homestead, my cabinet painting service uses 2K water-based polyurethanes — brands like Milesi, Renner, and Envirolak — that are specifically formulated for kitchen cabinet applications. These are the same finishes used on high-end new kitchens. Water-based means low odor and fast dry times, but the 2K chemistry is what gives you the hardness, adhesion, scratch resistance, and water resistance that kitchen cabinets demand around sinks and dishwashers.
The key distinction: 1K products cure by evaporation. 2K products cure by a chemical reaction. A chemically cured film is fundamentally harder and more resistant than one that simply dried out. This is why the same product that works fine on a bedroom dresser will fail on kitchen cabinet doors within a few years.
Where 2K really shows its value in a kitchen comes down to four things:
- Water resistance — critical around sinks, dishwashers, and coffee bars where moisture is constant.
- Adhesion — the chemical bond to the primer doesn't soften with heat or steam the way a 1K film can.
- Scratch and impact resistance — fingernails, pots, drawer fronts knocking — the cured film holds up.
- Hardness around handles — the high-touch zones are where cheap paint disintegrates first; 2K stays intact.
For furniture, a bedroom dresser, or cabinets outside the kitchen, a quality 1K product is often fine. But for the kitchen — where the moisture and abuse are constant — 2K is the only honest answer for long-term durability.
Prep is where the finish is won or lost
The coating you use matters — but prep is what the finish actually bonds to. I've seen 2K product fail because the surface under it wasn't ready. And I've seen 1K product last longer than expected because it was put over a very well-prepared surface. Prep is the foundation of everything.
Here's what thorough prep actually looks like on a professional cabinet painting job:
What the job looks like in your kitchen
Plan to be without your kitchen for the duration of the project. The kitchen is fully masked off with plastic barriers to contain dust and overspray. Hardware and cabinet doors are removed and marked for location, so everything goes back exactly where it came from. The cabinet boxes are prepped and painted in place; doors go to the shop where both sides can be done properly.
For an average kitchen, expect 3 to 5 days for the prep and painting work in your kitchen, plus additional time for the doors to be completed and installed. Total project time is typically 5 to 8 days from start to reinstalling the last door.
Pricing depends mostly on the count of doors and drawers, but a few other factors push the number up or down:
- Ceiling-height upper cabinets — extra-tall uppers running to the ceiling add door count and surface area.
- Island or peninsula details — finished backs, end panels, and decorative trim all get priced separately from the perimeter.
- Brand-new doors instead of repainting existing ones — a great option if you want to update the door style at the same time (shaker, slab, raised panel). It roughly doubles the price compared to painting existing doors, but is still less than full refacing.
- New soft-close hinges — often paired with new doors. A meaningful upgrade in feel for a relatively small add-on cost.
- Color complexity — a two-tone look (perimeter one color, island another) adds time but not a huge premium.
Before — maple kitchen with original honey finish
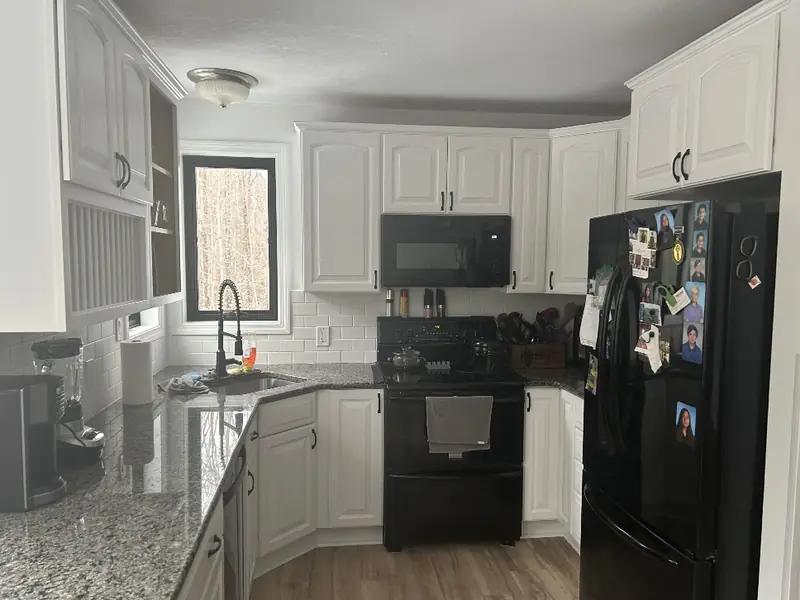
After — same kitchen, same cabinets, 2K painted finish
On the smell: I spray 2K water-based products, which have low VOCs. With good masking in place and ventilation while spraying, most homeowners tell me there's very little odor — far less than they expected. That said, fumes are a real concern for some families, especially with young children or respiratory sensitivities. If that's a consideration for you, cabinet refacing is worth a conversation — the parts are all finished at a shop before arriving to your home, so there's essentially no painting smell on-site.
The oak grain question
Oak is the most common wood species in Western Massachusetts kitchens built between the 1980s and early 2000s. It's also the most commonly painted — and the one that requires the most honest conversation before picking up a brush.
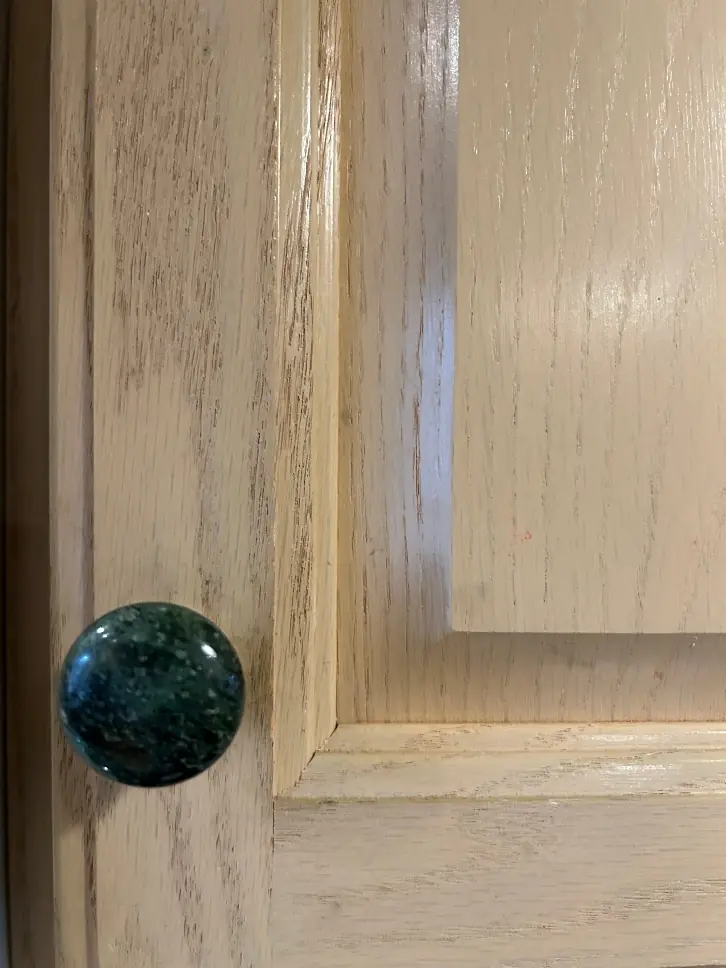
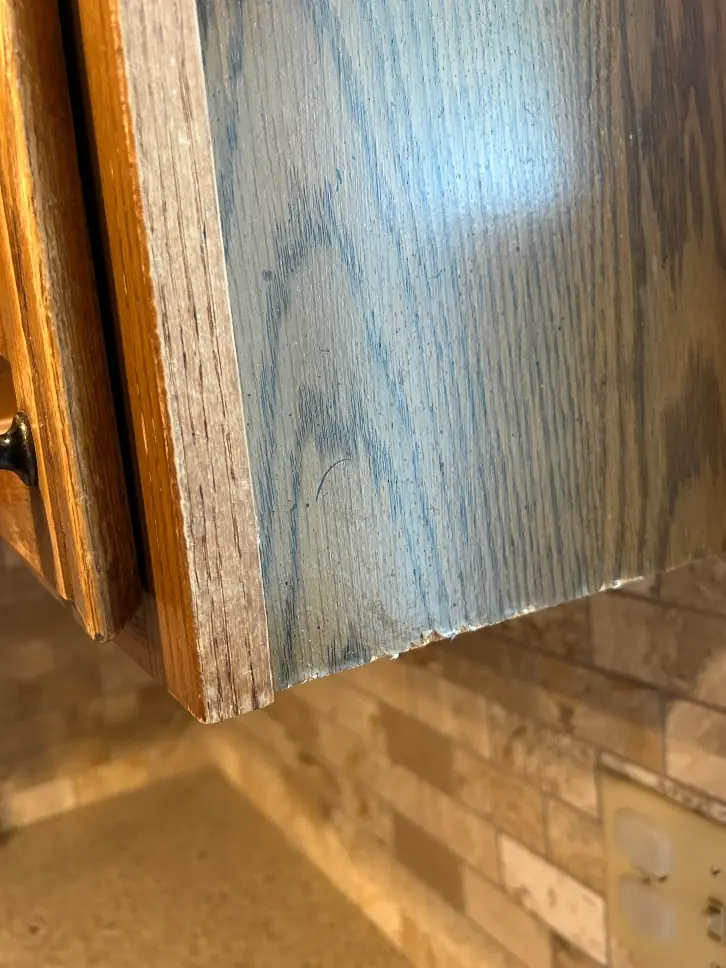
Raw oak grain up close — that deep open texture is what makes painting oak a different conversation than maple or cherry.
Oak has a deep, open grain structure. Even with a high-build primer and good sanding, that grain will show through paint. Not dramatically — but it will be there. Here's what a painted oak door looks like up close:
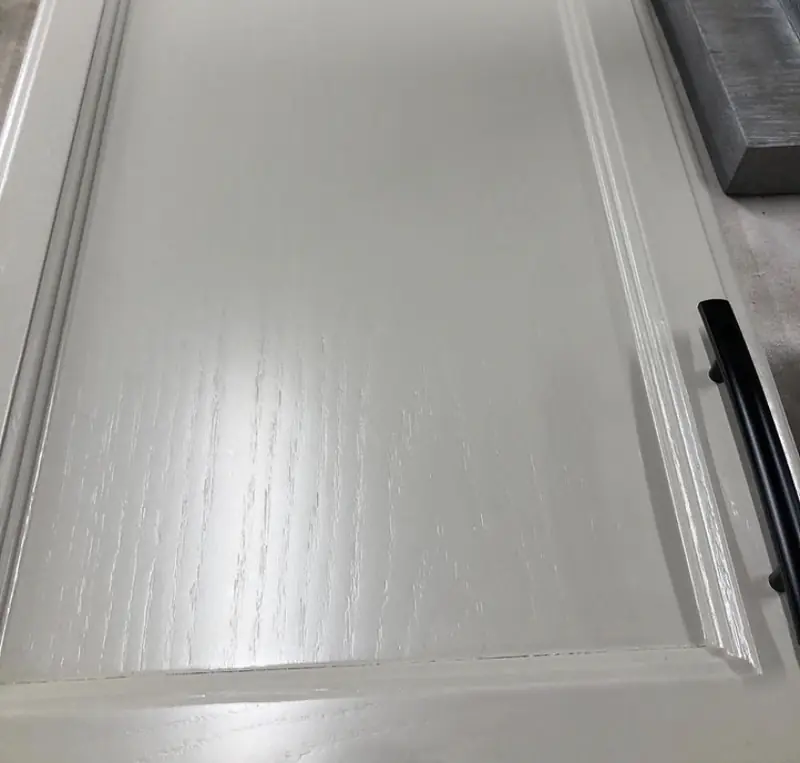
A painted oak door — the grain is visible. This is normal and expected. Whether it bothers you is a personal preference.
For some homeowners this is completely fine — the texture reads as natural character and the overall look is a significant improvement over honey oak. For others who want a perfectly smooth, grain-free finish, painting the oak doors may not be the right answer.
One more thing about oak doors: Wood panels in the center of cabinet doors can contract seasonally, revealing unpainted wood along the edges where the panel meets the frame. New paint-grade cabinet doors use MDF center panels specifically to avoid this. Also, some painters will caulk the gap between the panel and the frame — this is a mistake. That gap exists to allow the wood to move. Caulking it guarantees cracking. A proper paint job leaves sufficient gap around the panel so the door can be painted without bridging.
The hybrid solution: paint the boxes, reface the doors
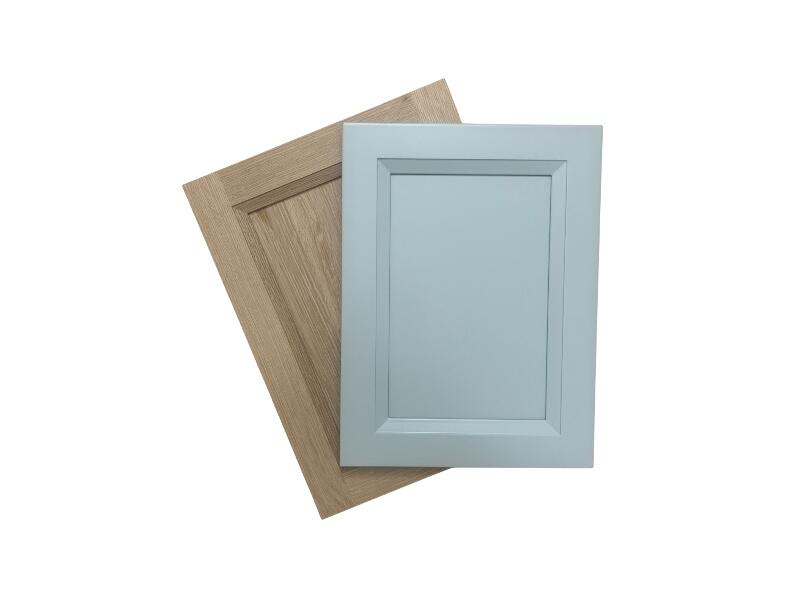
If you have oak cabinets, love the idea of a clean painted look, but want smooth door fronts without grain showing — there's a third option that most people don't know exists: paint the cabinet boxes and replace just the doors.
This hybrid approach gives you the best of both worlds. The boxes (which have flat surfaces that paint smoothly) get painted in your color. The doors are replaced with new paint-grade doors — typically MDF center panels in a shaker or flat style — that paint with a perfectly smooth, grain-free finish. You get the full transformation of a painted kitchen without the compromises.
It costs more than painting alone, but significantly less than full cabinet refacing, and the result is often cleaner than either option alone. If you have oak cabinets and you're on the fence, this is worth asking about on the consultation.
Is your kitchen a good candidate for painting?
Not every kitchen should be painted. Before committing to a paint project, here are the things worth checking:
Peeling thermofoil — painting over this won't hold. New doors are the right fix.
Particle board with bubbling or delaminating veneer — painting isn't the answer here either.
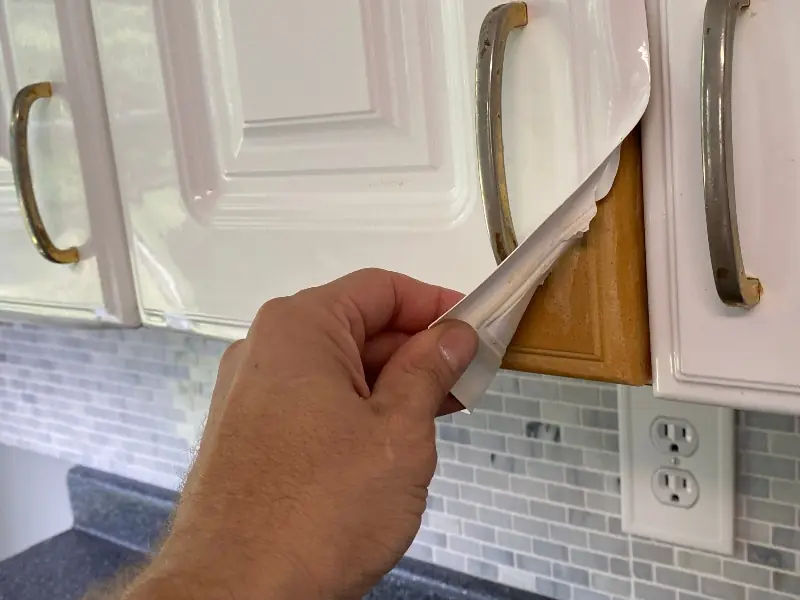
How to paint cabinets that are already painted
"Already painted" isn't one situation — it's two, and they're handled very differently.
Factory-painted cabinets go through our standard process: clean, prime, scuff-sand, prime again, and apply the color coats. A factory finish is a sound, well-bonded base to build on, so the result is every bit as durable as painting raw wood.
Hand-painted or DIY-painted cabinets are trickier. To bring them up to a professional standard, the existing coat usually has to be sanded back down to the original factory finish first. The other option, if you're staying DIY, is simply to paint over them again with a DIY cabinet paint.
The one hard rule: a professional 2K finish should not be applied directly over existing latex or trim enamel paint. Those coatings don't give the finish a reliable bond, so the old paint needs to come off first — otherwise you risk peeling down the road.
When cabinets are buried under heavy layers of old paint, full stripping gets so time-consuming it's rarely worth it. In that case the smarter move is often to replace the doors with new ones and only strip the cabinet faces — a clean, smooth result without fighting decades of buildup.
Painting vs. refinishing: which brightens a kitchen?
If you're trying to brighten a dark kitchen — going from honey oak, dark cherry, or espresso stain to something lighter — your options are painting or refacing with a lighter wood veneer. Refinishing with stain can go same shade or darker, but it cannot lighten wood. A light stain over dark wood will not produce a bright result.
Refinishing is also a more labor-intensive and less forgiving process than painting. Stripping an existing stain down to bare wood, getting a perfectly even result, and applying a new stain takes more time and offers fewer color options than painting does. If you love the look of natural wood grain but want to update the color, refinishing is the right path. If you want a color change — especially lighter — painting is faster, more flexible, and in most cases more affordable.
Stained vs painted — two different results for two different goals. Stain preserves the wood character; paint transforms the color completely.
| Cabinet Painting | Cabinet Refinishing | |
|---|---|---|
| Can go lighter? | Yes — any color | No — same or darker only |
| Grain visible? | Covered (or minimized) | Yes — wood look preserved |
| Works on MDF/non-wood? | Yes | Solid wood only |
| Color options | Unlimited | Stain palette only |
| Process time | 5–8 days total | Longer — stripping required |
Color choice and long-term maintenance
The color you choose doesn't meaningfully affect how long a 2K finish lasts — the coating chemistry is the same regardless of color. But it does affect what kind of wear you'll notice first.
Very light colors (bright white, off-white) will show scratches more easily because the contrast between the paint surface and any nick or scratch is more visible. They also show dirt and fingerprints readily, especially near handles and edges.
Very dark colors (navy, black, deep charcoal) are harder to scratch visibly but show dust, water spots, and smudges more than mid-tone colors. They can look great and stay looking great with regular wiping, but require a bit more daily attention.
Mid-range colors — warm whites, greiges, sage greens, soft grays — tend to be the most forgiving. They hide day-to-day wear better than either extreme and have remained popular choices for exactly that reason.
For cleaning, warm water and mild dish soap (like Dawn) is all you need. A painted 2K surface is durable, not indestructible, and treating it the way you'd treat a painted car finish will keep it looking good for the long haul. A short list of what to avoid:
- Pledge, Murphy's Oil Soap, and other silicone-based polishes — they leave a residue that dulls the finish and interferes with any future touch-up work.
- Abrasive scrub pads (Scotch-Brite, steel wool) — these scratch the topcoat.
- Harsh chemical cleaners (bleach, ammonia, oven cleaner) — these can soften or discolor any cabinet paint.
- Letting water sit around the sink, dishwasher, or coffee maker — a quick wipe-down after spills protects the seams and edges where water can sneak in.
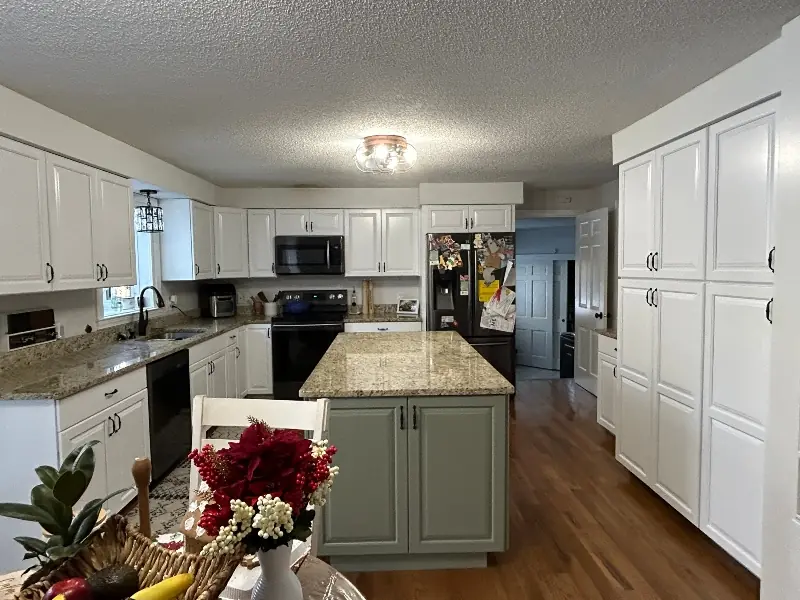
White perimeter cabinets with a contrasting painted island — one of the most popular color combinations, and a great example of how color choice affects the overall feel of the kitchen.
Touch-up paint: I always leave some touch-up product with homeowners. 2K touch-up paint has a working life of up to a year once mixed, so there's a window to address minor scuffs and nicks while the paint is still viable. Small scratches from normal use can almost always be spotted in without anyone noticing.
The best cleaner for painted cabinets
A painted cabinet finish has a specific sheen, and the goal of cleaning is to lift grime without dulling it. The best cleaner is also the simplest: warm water and a mild detergent like Dawn dish soap on a soft cloth, then dried off.
A few specifics protect the finish:
- Use plain Dawn — not Dawn Powerwash or Powerscrub. The "power" versions are more aggressive than a painted finish needs.
- Skip buffing or "magic" erasers. They're mildly abrasive and can flatten the sheen in one spot, leaving a dull patch.
- Avoid oils and silicones like Murphy's Oil Soap and Pledge — they leave a residue that dulls the finish and interferes with any future touch-up.
- Not sure a product is safe? Test it on the back of a cabinet door first. If it doesn't affect the sheen there, it's fine to use out front.
Treat the finish the way you'd treat a painted car surface and it will hold its luster for years.
Frequently asked questions
How long does professionally painted cabinet last?
With a proper 2K polyurethane finish, professionally painted kitchen cabinets should last 10 to 20 years. The finish should not chip or peel from normal use — if that happens within the first few years, the wrong product or insufficient prep is almost always the cause.
What's the difference between 1K and 2K cabinet paint?
1K products come ready to use from a single container (Benjamin Moore Advance, SW Emerald Urethane). They cure by evaporation and work fine on furniture and trim. 2K products require mixing a base and hardener that chemically react and cure into a hard, durable film — like automotive paint. Kitchen cabinets need 2K chemistry to hold up to heat, moisture, and constant use.
Are painted cabinets less durable than new factory-finished cabinets?
No — and this is one of the most common myths about cabinet painting. The 2K water-based polyurethanes I use are the same finishes specified on high-end brand-new kitchens. They actually outperform the factory finish on most box-store cabinets, which use thinner, cheaper coatings to hit a price point. A professionally painted kitchen is not a downgrade from new — and in many cases it's an upgrade in finish quality.
Can you paint over previously painted cabinets?
Yes — and we can color-match your existing color if you just want a refresh without a change. The exception is cabinets that were hand-painted with latex (common in homes from the 1960s and 70s). Painting over poorly bonded latex will fail, so the old finish often needs to come off first. In those cases cabinet refacing with new doors is often a better route than stripping and repainting.
Do painted kitchen cabinets yellow over time?
Oil-based whites and some 1K water-based whites can yellow over the years from moisture, cooking oils, and UV. Quality 2K water-based polyurethanes are formulated to resist yellowing far better. Choosing a warm white or off-white instead of a bright cool white also helps — any subtle shift over time is much less noticeable in warmer tones.
How do you clean painted kitchen cabinets?
Warm water and a mild dish soap like Dawn is all you need. Wipe with a soft cloth and dry thoroughly. Avoid polishes like Pledge and Murphy's Oil Soap — they leave a silicone residue that dulls the finish and can interfere with any future touch-up work. Skip abrasive scrub pads and harsh chemicals too.
Can oak cabinets be painted?
Yes, but the open grain of oak will show through paint even with a high-build primer. The texture is subtle but visible. If you want a perfectly smooth, grain-free look, the better answer is the hybrid approach: paint the cabinet boxes and replace just the doors with new paint-grade MDF doors that finish completely smooth. See our guide on updating oak cabinets for more on this.
Will painted cabinets chip?
Any paint can chip if you hit it hard enough — same as the paint on your car. A cast iron pot dropped against a corner, a sharp impact from a heavy object, those can mark any finish. What a quality 2K finish shouldn't do is chip from normal use, or wear and disintegrate around the handles — that's the signature failure of cheap cabinet paints. With a 2K product, edges and high-touch areas should hold up for the long haul.
Ready to talk through your kitchen? If you've read this far, you're already thinking through the right questions. Send a few phone photos of your current cabinets and Raymond will give you an honest read on whether painting is the right move — or whether refacing or even staying with what you have makes more sense. No pressure, no showroom pitch. Request a free consultation or call (413) 450-0028.