Should you paint your cabinets yourself?
This is the question almost every homeowner wrestles with first, so let's answer it honestly. You can paint your own cabinets. Plenty of people do. But the two things most people underestimate are how much of the job is preparation and how much difference professional spray equipment makes to the final look.
The real answer usually shows up after the fact: once someone sees the smooth, even, durable finish a professional can produce, most are genuinely glad they didn't try to tackle it themselves. A rushed DIY job tends to show brush marks, uneven sheen, and wear around the handles within a year. This post walks you through what the professional process actually looks like — so whichever way you lean, you know what you're comparing.

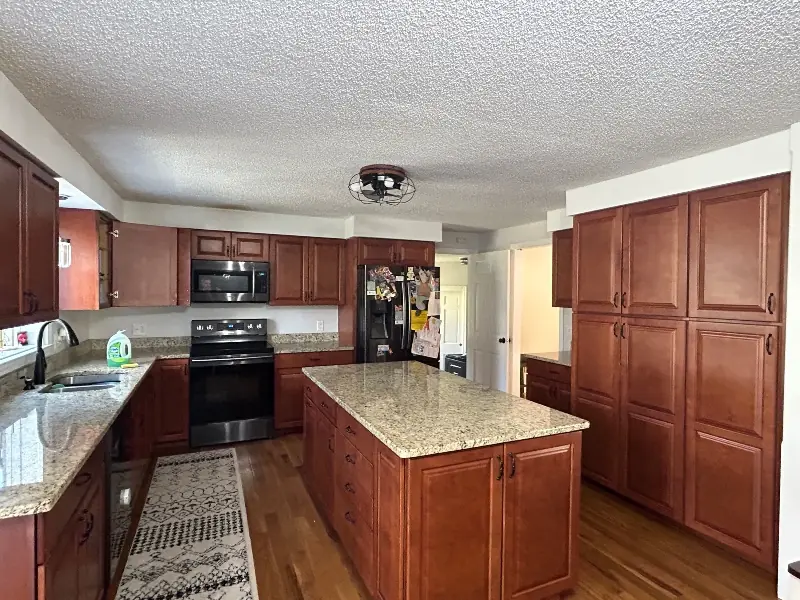
The typical starting point — solid cabinets with a dated or worn finish. Structurally fine, and a strong candidate for professional painting.
What professional cabinet painting actually involves
The short version: your doors and drawer fronts come off and go back to our shop, where they're sprayed under controlled conditions. The cabinet boxes stay in your home and are finished on-site. Then the sprayed doors go back on. That split — shop for the doors, your kitchen for the boxes — is what lets us get a factory-smooth finish on the parts you look at most while keeping the boxes in place.
Here's the whole thing from your side, start to finish:
The headline numbers: total project time runs about two weeks from doors-off to reinstall. The active in-home work is around four days, and you should plan on not using your kitchen for roughly five days. It's a real disruption while it's happening — but a fraction of what a full remodel puts you through.
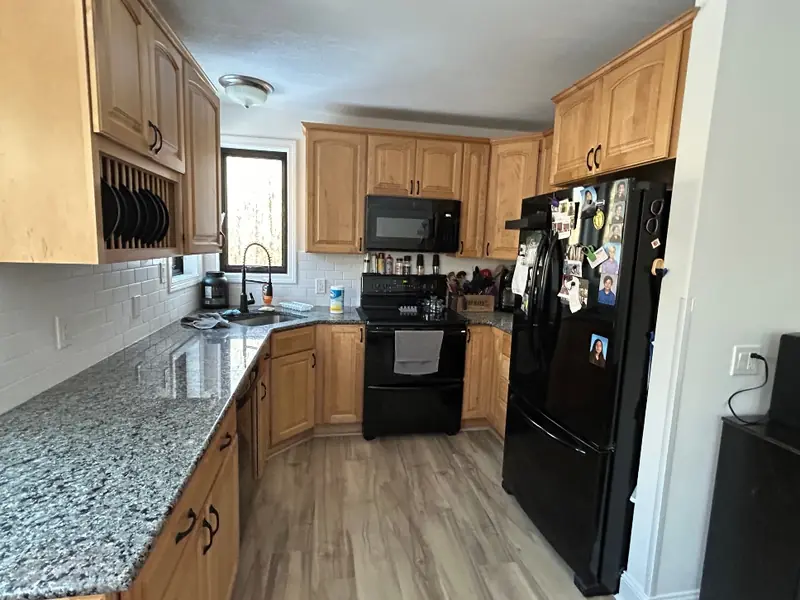
Before — dated maple.
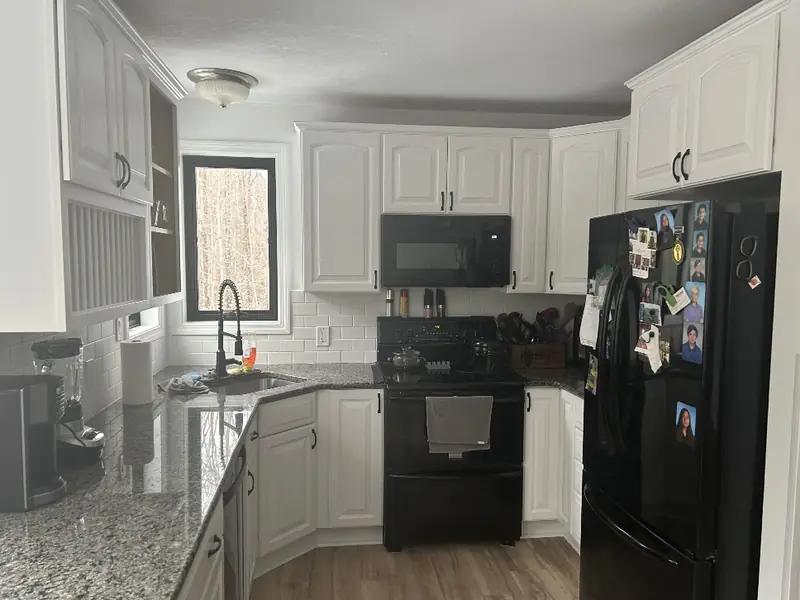
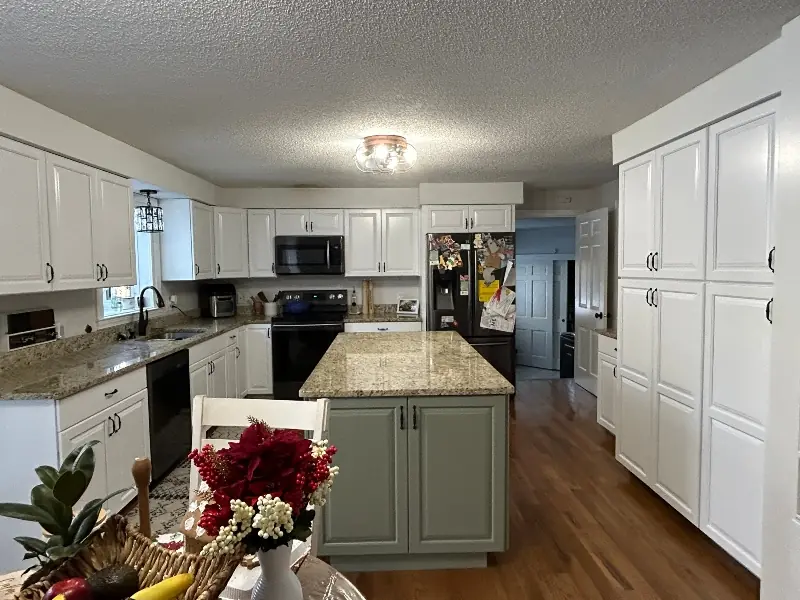
After — professionally sprayed. Same boxes, brand-new look.
Spray vs. roll: how the finish is applied
People often ask whether their cabinets will be sprayed or rolled. The honest answer is both have a place, and here's how we use each:
- Doors and drawer fronts are always sprayed at our shop. Spraying produces the smoothest, most factory-like finish, and the shop gives us control over dust, temperature, and airflow that you can't get in a lived-in kitchen.
- Cabinet boxes and face frames can be sprayed or rolled in your home. A spray finish is the smoothest, but a skilled hand with a quality roller can produce very good results for less money.
Here's the part that makes the rolled-box option work so well: the sprayed doors sit in front of the boxes and become the focal point. Your eye goes to the door faces, not the frames behind them. So a rolled box paired with sprayed doors can look excellent while keeping the project more affordable — that's a real choice you get to make on the consult.
Whichever way the boxes go, the finish itself matters. We spray a durable 2K finish — the same class of coating (brands like Renner) that goes on high-end factory cabinetry — so the result holds up to real kitchen use. If you want the full breakdown on that, see our guide on how long cabinet painting lasts.
Doors sprayed at the shop under controlled conditions — the smooth, even faces that become the focal point of the finished kitchen.
What it's like in your home during the job
This is the part homeowners most want to picture ahead of time, so here's the straight version. Painting cabinets in a lived-in kitchen makes dust, so a good crew's job is largely about controlling that dust and the fumes. Here's what we set up:
- A plastic barrier wall. The whole kitchen gets barricaded off with plastic sheeting to keep dust from drifting into the rest of your home.
- Strong ventilation. We ventilate throughout the finishing process to clear paint smell and airborne dust.
- HEPA dust control. Sanding is done with a high-powered HEPA vacuum sander to capture dust right at the source and keep it out of the air.
A few things worth knowing so you can prepare:
Boxes being finished on-site, with the kitchen sealed off and dust controlled at the source.
The hidden work: prep is most of the job
If there's one thing homeowners underestimate, it's prep. Most people picture the color going on. But the time and skill that make paint last are almost all in the preparation — the cleaning, the sanding, the masking — long before a drop of finish is sprayed. This is exactly why the kitchen is a work zone for a few days and why the result looks so different from a weekend DIY attempt.
Good prep is also what keeps the finish from failing early. Skip the degreasing and the sanding, and even a great coating will peel. Do them thoroughly, and the finish bonds and lasts.
Before the prep and paint.
After — the payoff for the prep you don't see.
When painting isn't the right fix
Part of an honest consultation is telling you when not to paint. A few situations make cabinets a poor candidate:
One more expectation to set: if you have open-grain oak, the grain texture will still read through paint. That's not a flaw in the work — it's the nature of oak. Some people love it; if you want perfectly smooth faces, replacing just the doors is the way to get there.
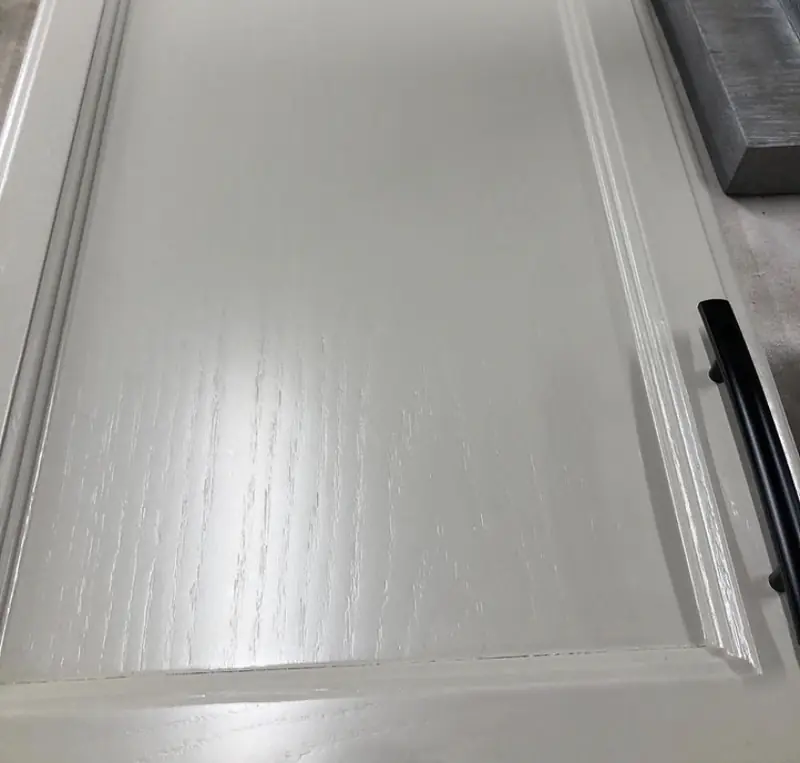
Painted oak — the grain still shows through, which is the nature of oak rather than a prep issue.
What order should you update your kitchen?
Cabinets are usually the anchor of a kitchen refresh, and a lot of people want to know how painting fits with everything else they're planning. As a general rule, paint the cabinets first, then work outward:
- Cabinets — paint these first; they set the tone for the room.
- Countertops and backsplash — best done after the cabinets are painted (though they can go before if your timing requires it).
- Flooring — after the cabinets.
- Wall paint — save this for last, once everything else is in.
Doing it in this order keeps freshly finished surfaces from getting scuffed, dusted, or splattered by the work that comes after. None of it is rigid, but this sequence gives the cleanest result.
What professional painting costs — and what raises it
We keep specific pricing to your quote, but the shape of it is easy to understand. Painting your existing cabinets is typically less than refacing and far less than all-new cabinetry, which is a big part of why it's such a popular update. Where the number climbs is when you add to the scope:
- New hardware — handles and knobs.
- New hinges and drawer slides — including soft-close upgrades.
- New drawer boxes or organizers — pull-outs, dividers, and inserts.
- New moldings — crown and trim added during the project.
- Additional cabinetry — new cabinets built to extend or complete the kitchen.
The paint itself is the baseline; those add-ons are where you tailor the project to your budget. We'll lay it all out on the consult so there are no surprises.
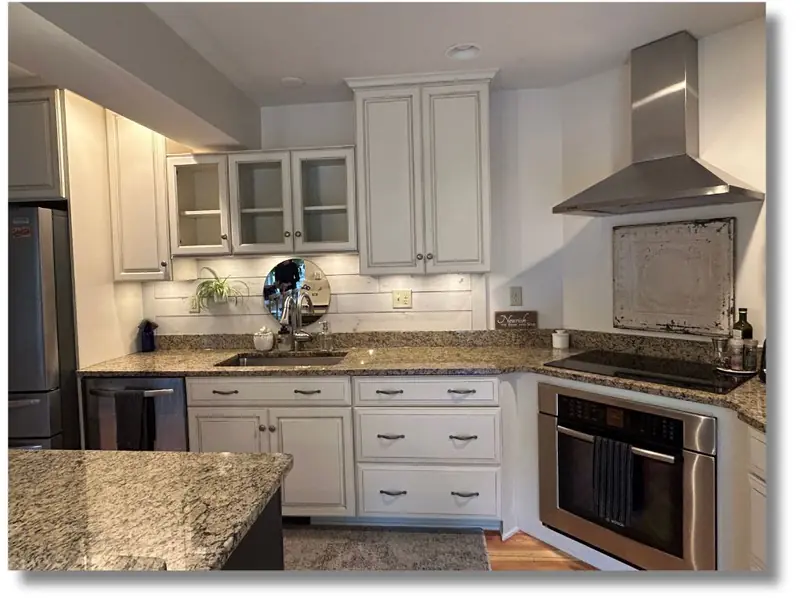
Add-ons like new hardware, moldings, or a glaze let you tailor a painting project to the look and budget you want.
Frequently asked questions
Should I just paint my kitchen cabinets myself?
You can, but most people underestimate how much of the job is prep and how much difference professional spray equipment makes. After seeing the finish a professional can achieve — smooth, durable, and even — most homeowners are glad they didn't try to tackle it themselves. A DIY job usually shows brush marks, uneven coverage, and early wear that a properly prepped and sprayed finish avoids.
How long does professional cabinet painting take, and can I use my kitchen?
Total project time is about two weeks. The doors come off first and go back to the shop, and a week or two later the cabinet boxes in your home are painted over roughly a four-day stretch. Plan on not using your kitchen for about five days. It's disruptive while it's happening, but far less so than a full remodel.
Where are the cabinets actually painted?
The doors and drawer fronts are always sprayed at our shop, where we control dust, temperature, and airflow for the smoothest possible finish. The cabinet boxes and face frames stay in your home and are finished on-site — either sprayed or rolled — then the sprayed doors go back on and become the focal point.
Is spraying better than rolling?
Spraying gives the smoothest, most factory-like finish, which is why we always spray the doors. A skilled hand with a quality roller can still produce very good results on the boxes for less cost. Because the sprayed doors sit in front and draw the eye, a rolled box paired with sprayed doors can look excellent while keeping the budget down.
Will painting make a mess in my house?
We take real steps to control it. The kitchen is sealed off with a plastic barrier wall to contain dust, we ventilate well to clear paint smell and airborne dust, and we sand with a high-powered HEPA vacuum sander to minimize dust. Emptying the cabinets is best; anything left inside can shift or vibrate during sanding. Appliances are ideally moved out but can be masked in place at a small risk of a scratch or overspray — dishwashers typically stay put.
What order should I update my kitchen — cabinets, counters, floors, and walls?
As a general rule, paint the cabinets first, then do countertops and backsplash, then flooring, and paint the walls last. Doing it in that order keeps fresh surfaces from getting scuffed or dusted by later work. Some of these can be done before the cabinets if needed, but this sequence gives the cleanest result.
Thinking about painting your cabinets? Send a few phone photos of your kitchen and Raymond will give you an honest read on whether painting is the right move — and walk you through exactly what your project would look like. No showroom pitch, no pressure. Request a free quote or call (413) 450-0028.